Chimera-Linux-LUKS-LVM-BTRFS
Chimera Linux
Goal
This document will walk you through installing Chimera Linux with KDE Plasma on top of a Snapper ready BTRFS file system that resides inside a Logical Volume Manager (LVM) Logical Volume (LV) inside a Volume Group (VG) inside a encrypted Linux Unified Key Setup (LUKS) partition
Note: The configuration and usage of Snapper is out of scope for this document.
Target System
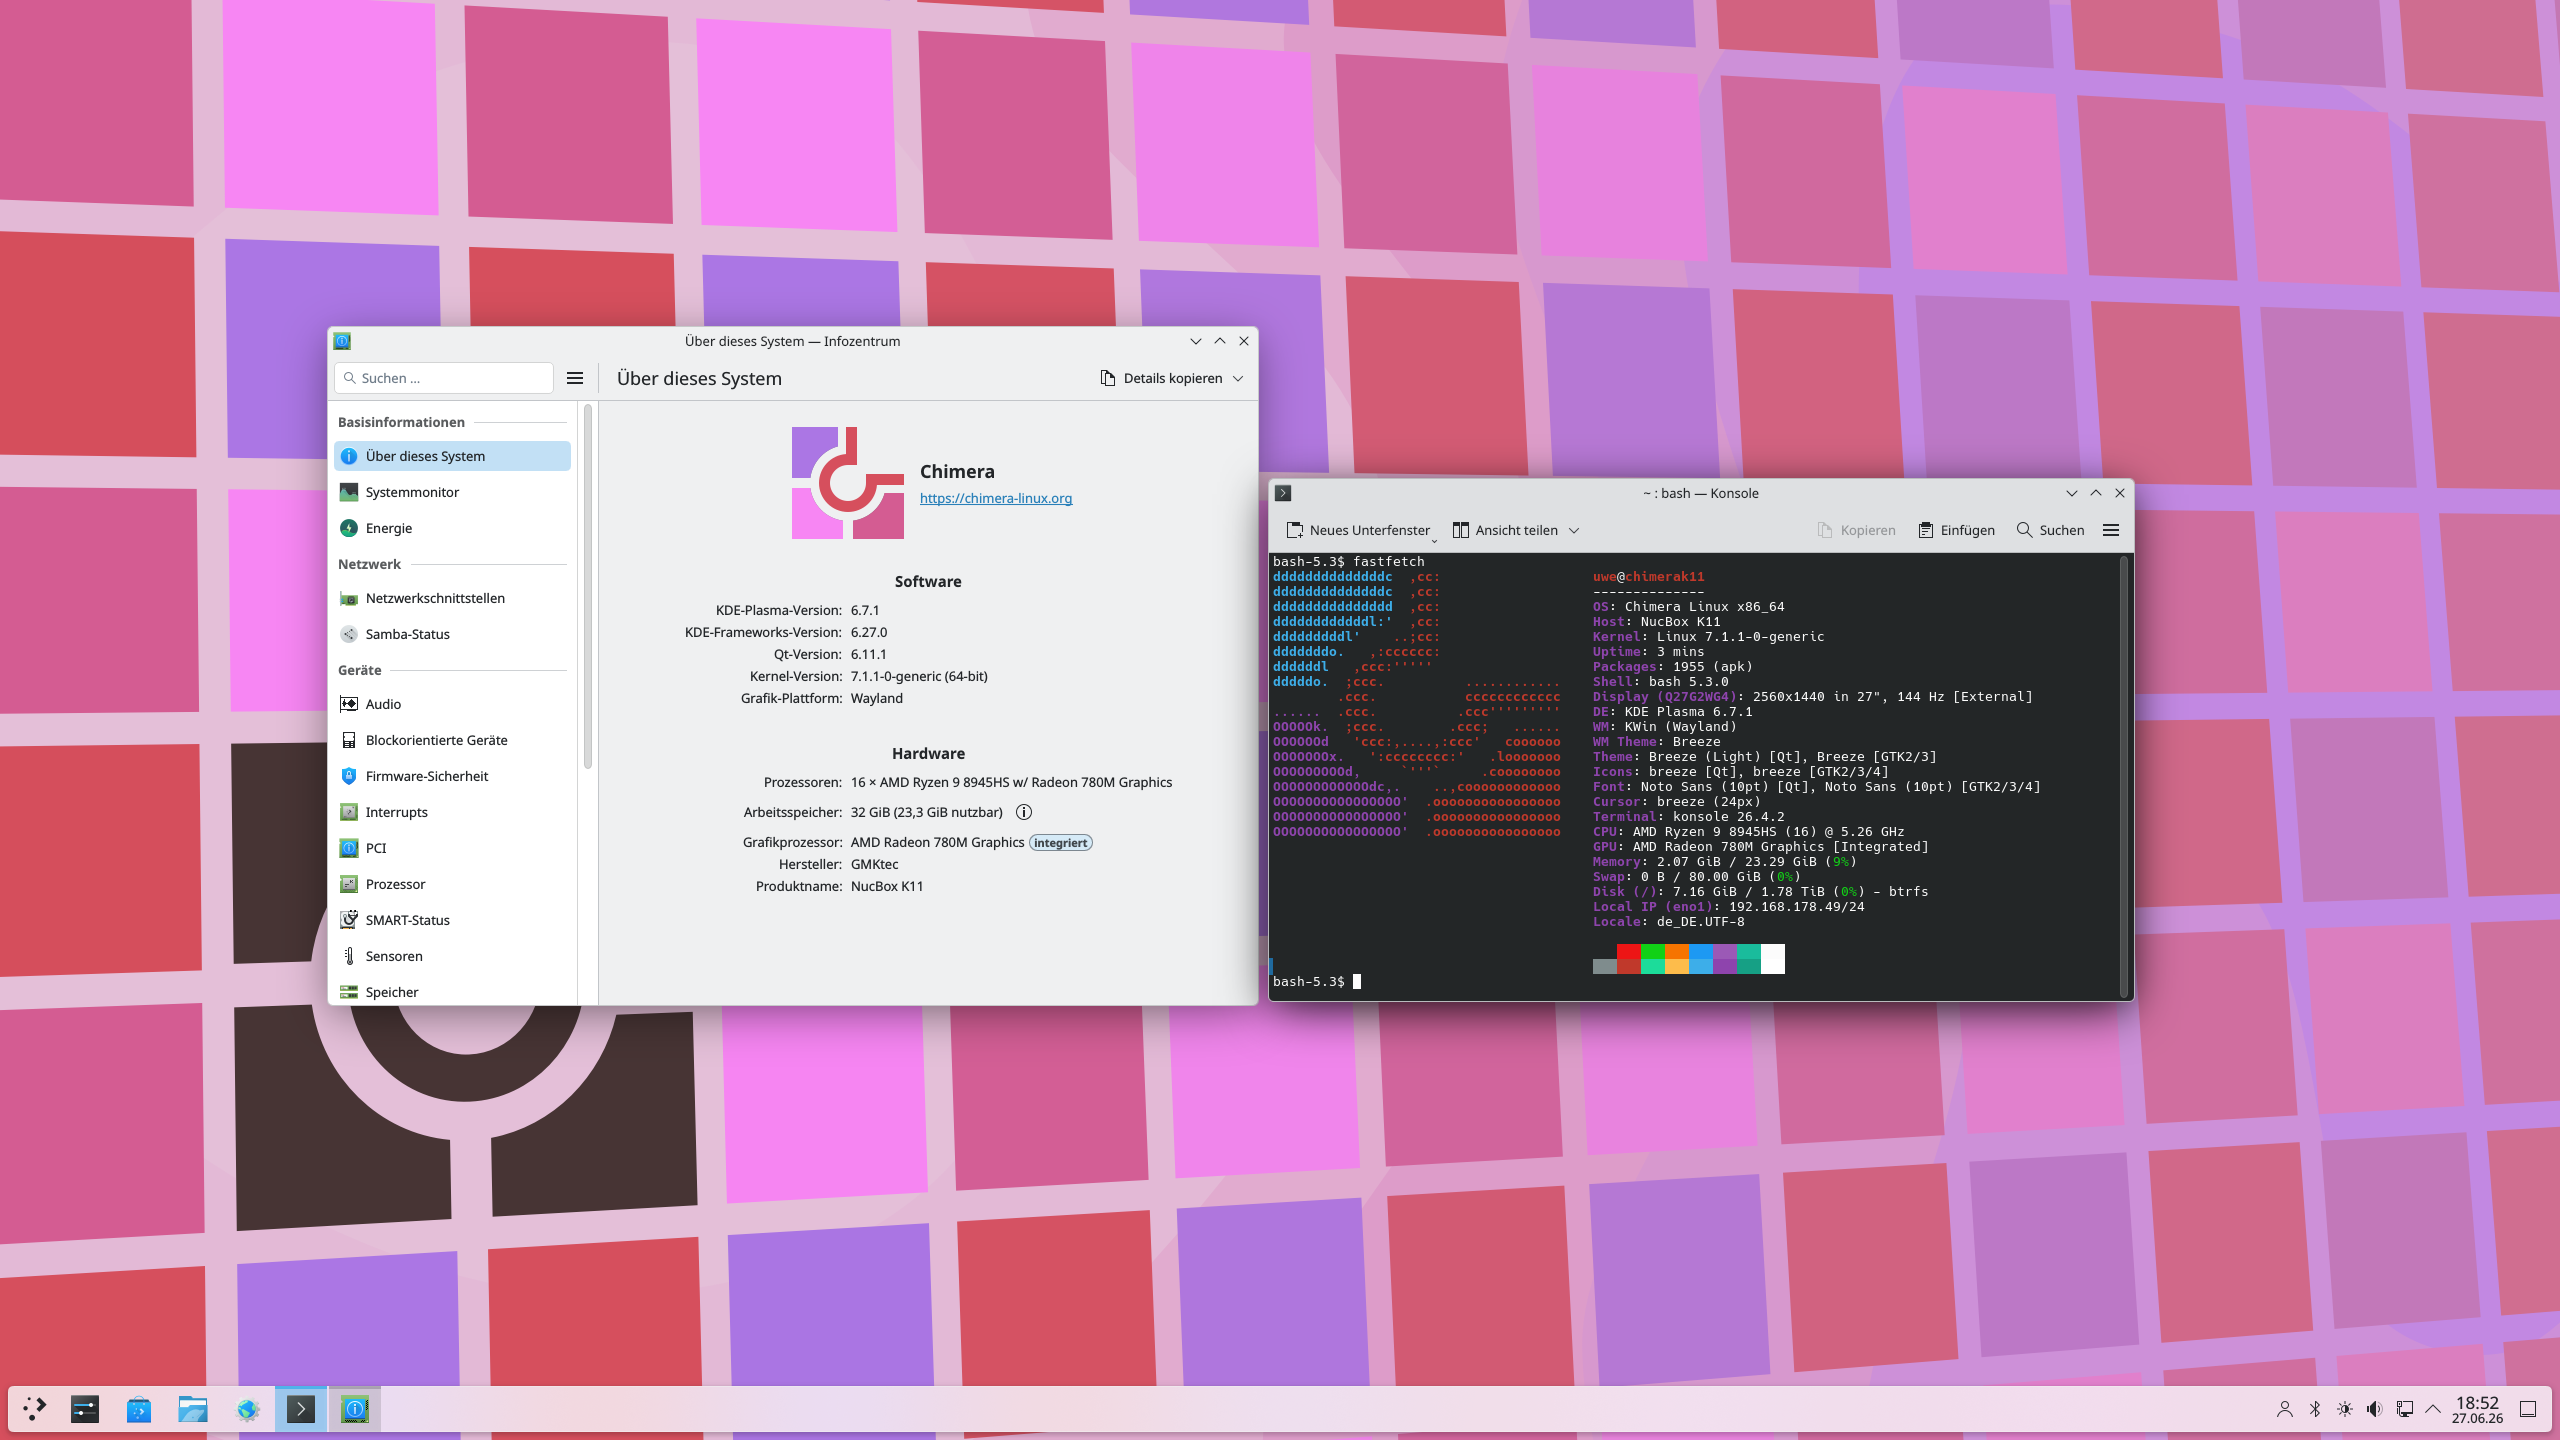
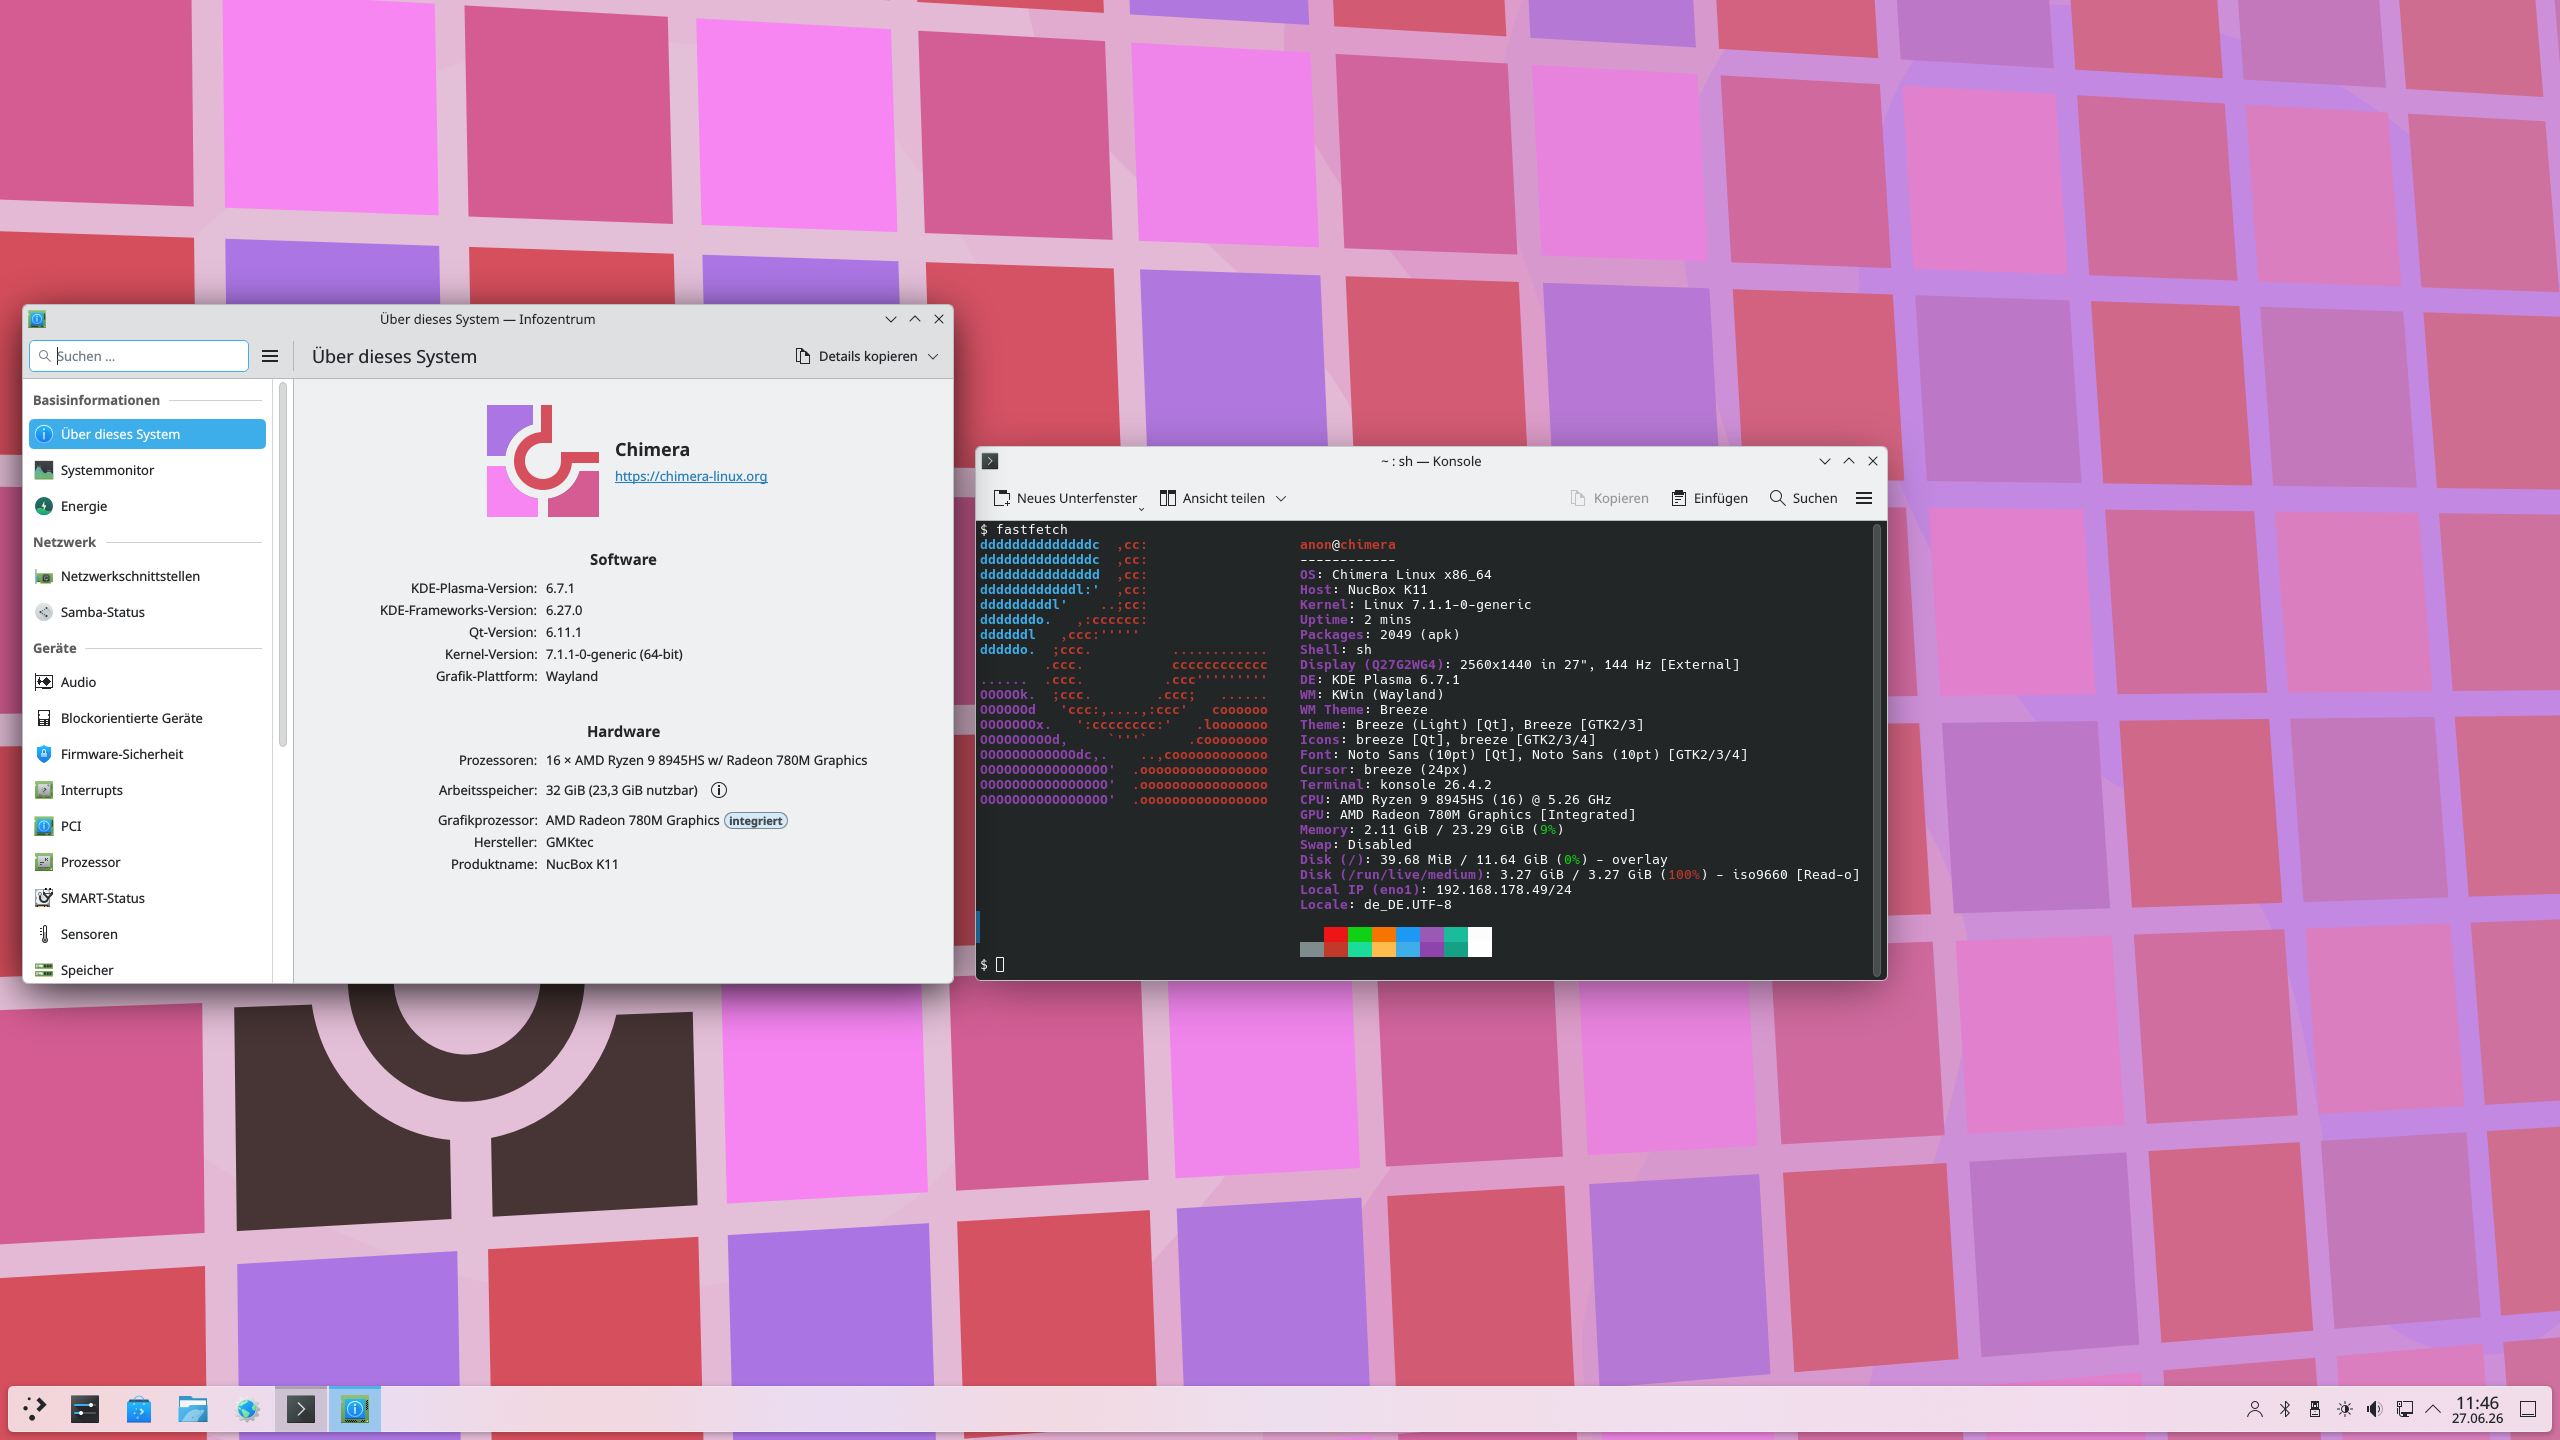
In this example our target system is a GMKtec NucBox K11 Mini-PC running
- CPU AMD Ryzen™ 9 8945HS 8 Cores 16 Threads
- Ram 32 GB
- Drive 2TB
- booted via Unified Extensible Firmware Interface (UEFI)
- System Language EN/DE
You have to adjust accordingly for your own needs. Please utilize the official Chimera Linux Documentation)
Preparation
the current official Chimera Linux Plasma KDE live Image is our installation environment.
Please adjust the following URL accordingly as the one in this guide is current as of writing.
https://repo.chimera-linux.org/live/latest/chimera-linux-x86_64-LIVE-20251220-plasma.iso
For validation of the official image see Chimera Linux Installation Documentation
Note: I provide more frequently updated Chimera Live Images for AMD64/x86_64 and AARCH64 here
This images come with aditional packages pre-installed.
Please see This Fediverse post for the current state of the images.
Now it’s time to boot our machine/VM from the installation environment.
After the system is booted we start with the actual Installation.
Installation
What to install?
Bootstrapping Chimera Linux is very similar to bootsrapping ARCH or Debian
Prepare the Installation Environment
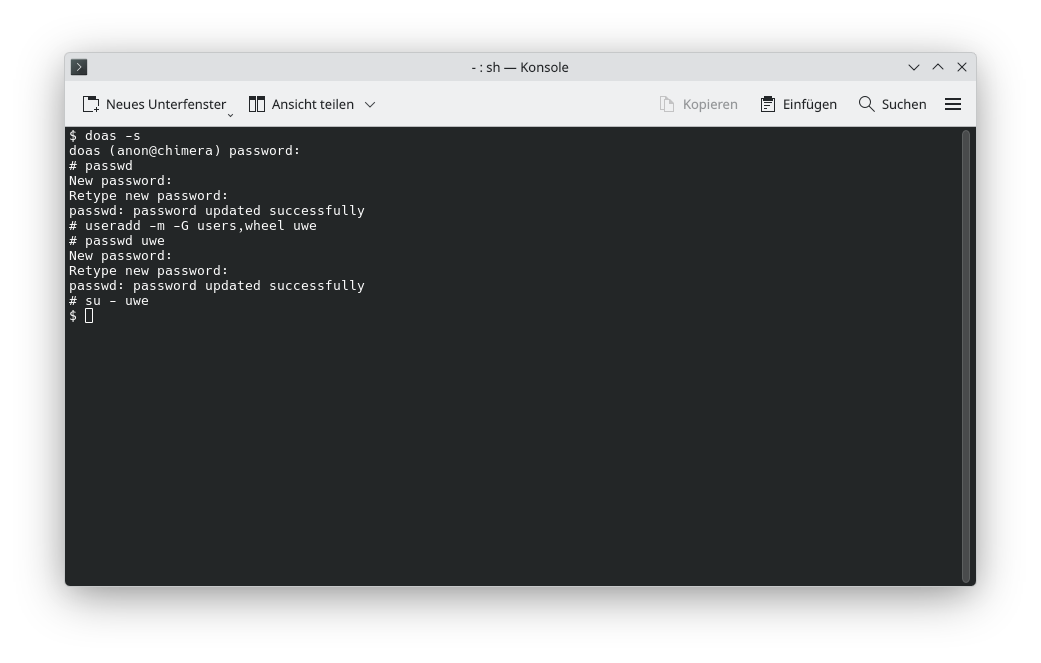
Chimera Linux defaults to the doas command to execute tasks with superuser (root) privileges.
Open the Console by starting Konsole
Change root password and create our install user
Chimera Linux Live Images come pre-configured wth two useres.
the root user with the default password chimera
and the anon user with the default password chimera.
anon is a member of the group wheel and can perform tasks as superuser via the doas command
doas -s
passwd
useradd -m -G users,wheel uwe
passwd uwe
su - uwe
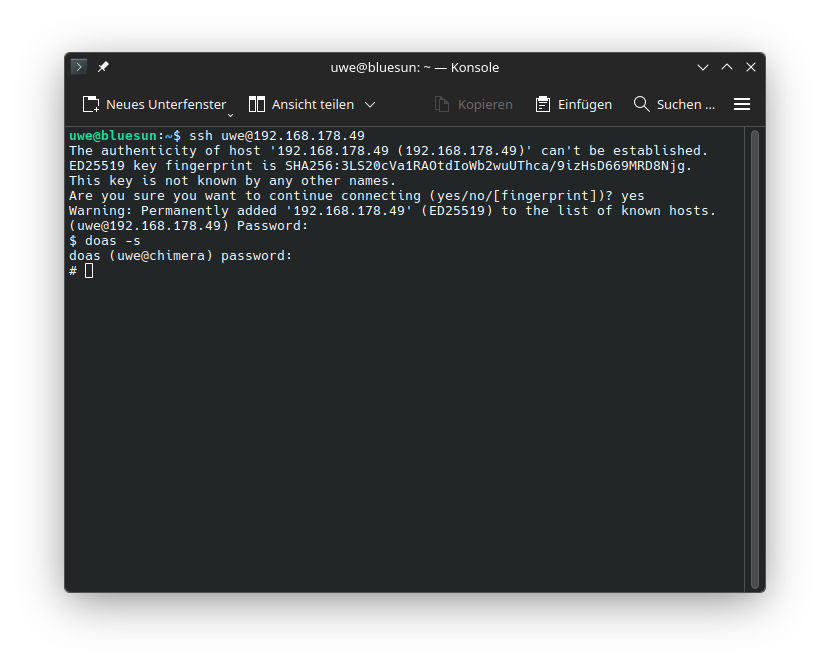
(optional) start sshd
This step can be skipped if the installation is done locally
doas dinitctl enable sshd
(optional) get the IP Address of our Install Environment
ip a
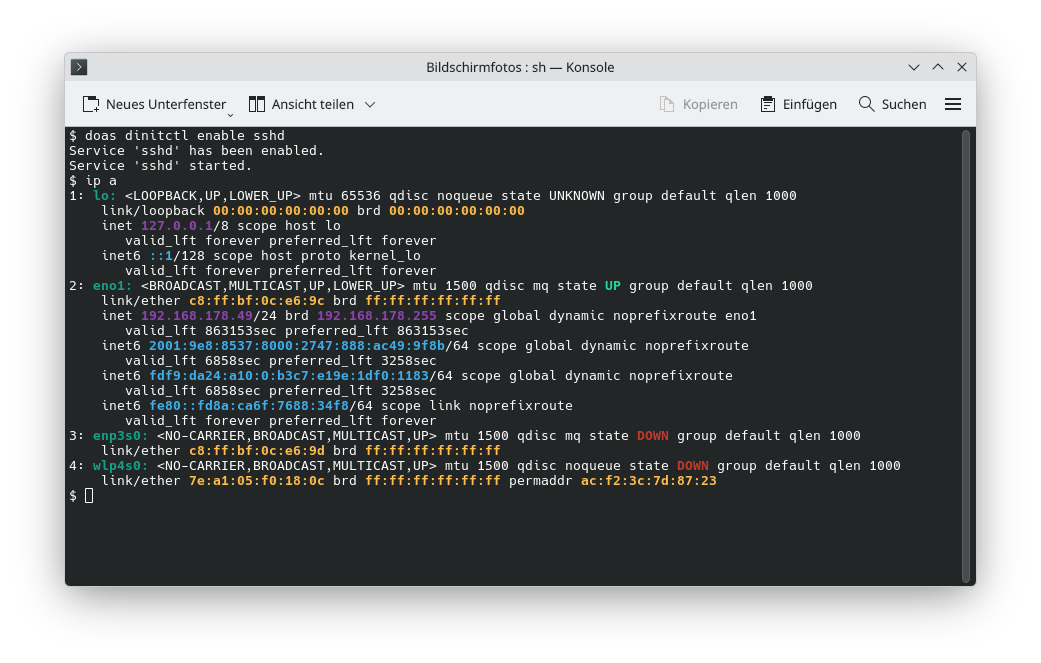
At this point you can either continue the installation locally or ssh into the Installation Environment and continue from remote
All the following steps need to be performed with superuser (root) privileges
doas -s
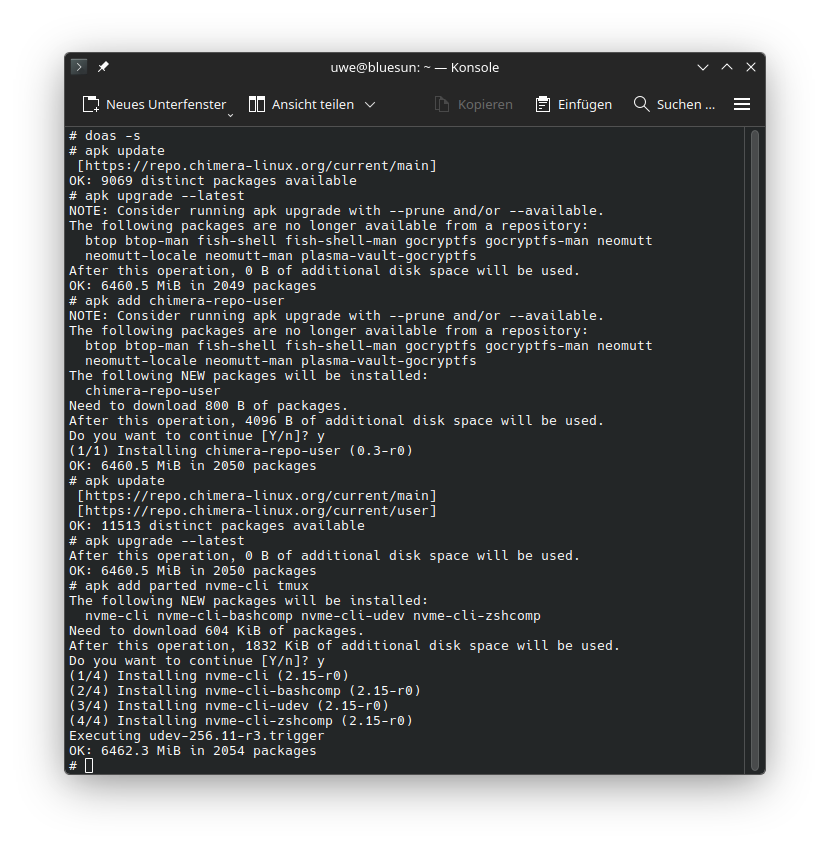
(optional) update the installation environment
If you use the official Chimera Live Image you now have to update, make the users repository available and install some tools
doas -s
apk update
apk upgrade --latest
apk add chimera-repo-user
apk update
apk upgrade --latest
apk add parted nvme-cli tmux
prepare Installation target
our target device is called /dev/nvme0n1 because it’s a NVMe Express m.2 SSD block device other valid targets are
/dev/vd?
/dev/sd?
/dev/nvme?n?
/dev/mmcblk?
Note: replace ? with the number/letter that specifies your target device
sanitize the target device
Wipe the device
Remove all File system, RAID and Partition Table signatures from target device
wipefs -a /dev/nvme0n1
(optional) secure erase the target drive
For NVME SSDs perform nvme sanitize /dev/nvme0 -a 0x02 and for all other block devices perform blkdiscard -vfz /dev/nvme0n1.
Note: This operation can take a long time depending on size and speed of the target drive.
Partitioning the target device
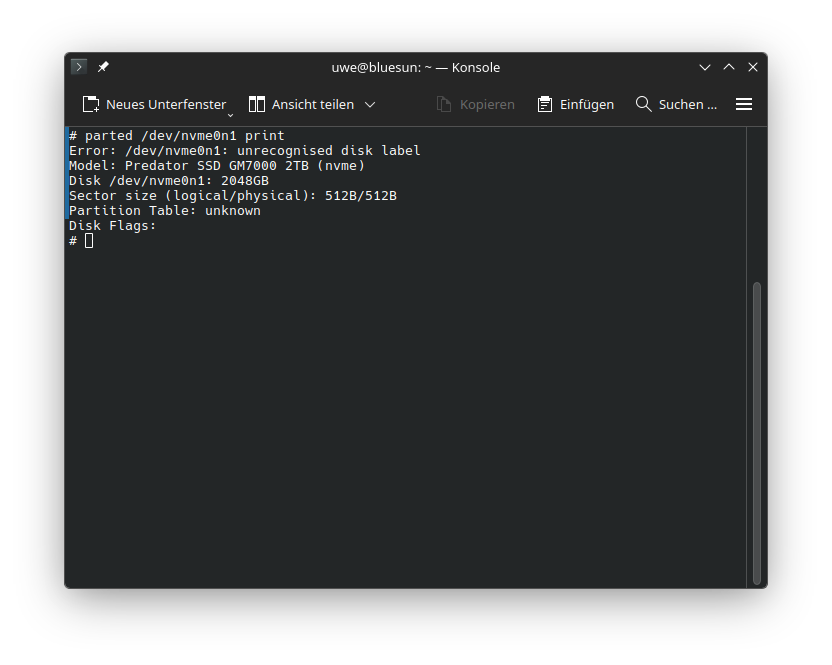
Check that the target is indeed empty
parted /dev/nvme0n1 print
Create the Partition Table and Partitions
parted /dev/nvme0n1 mklabel gpt
parted /dev/nvme0n1 mkpart primary fat32 0% 2.5GB
parted /dev/nvme0n1 name 1 esp
parted /dev/nvme0n1 set 1 esp on
parted /dev/nvme0n1 set 1 boot on
parted /dev/nvme0n1 mkpart primary 2.5GB 100%
parted /dev/nvme0n1 name 2 LUKS-crypt
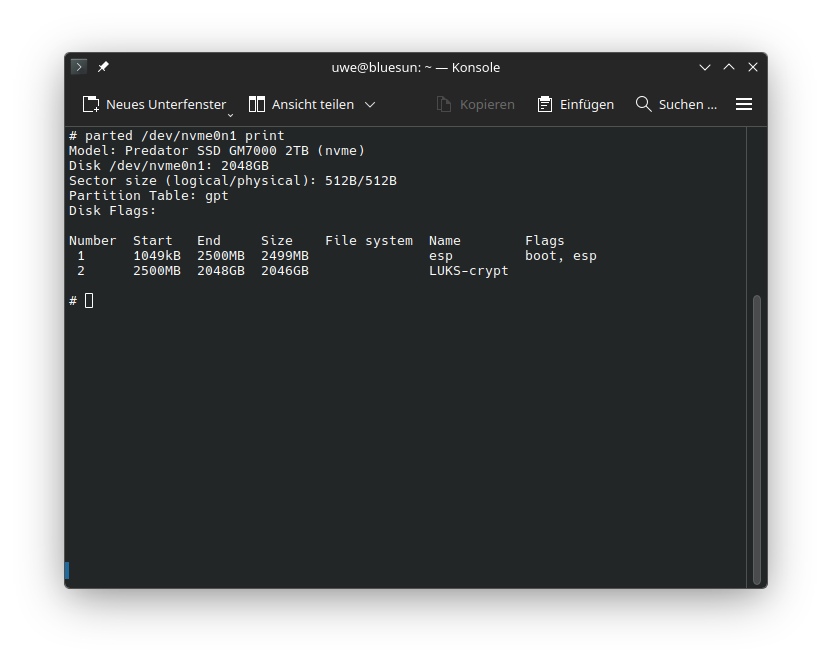
Check that the target device is correctly partitioned
parted /dev/nvme0n1 print
EFI File system creation
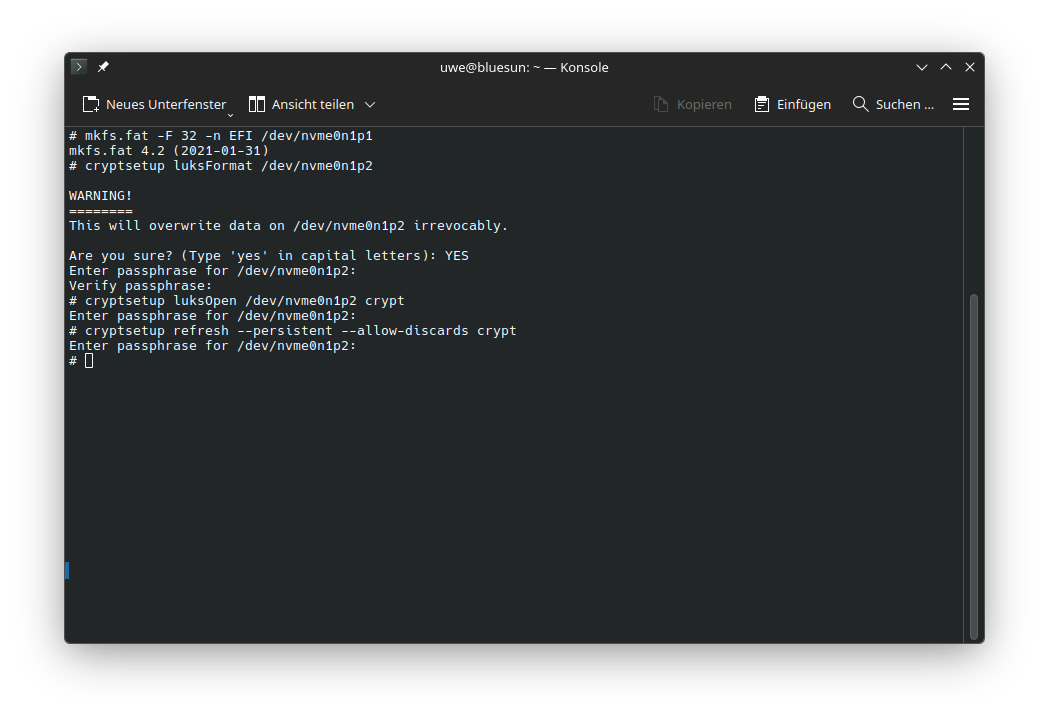
mkfs.fat -F 32 -n EFI /dev/nvme0n1p1
LUKS Partition creation
cryptsetup luksFormat /dev/nvme0n1p2
unlock the LUKS Container and map it to /dev/mapper/crypt
cryptsetup luksOpen /dev/nvme0n1p2 crypt
(optional) enable discards on LUKS
SSD/SD/MMC block devices should enable discards
cryptsetup refresh --persistent --allow-discards crypt
LVM configuration
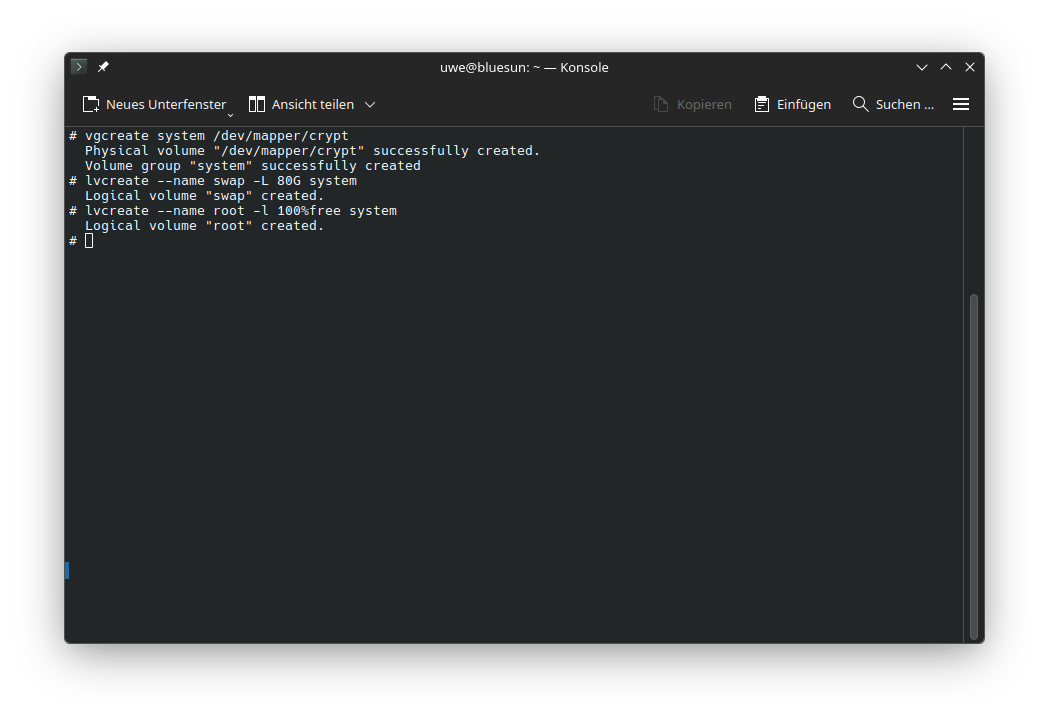
Create a Physical Volume (PV) mapped to our LUKS Container and a Volume Group (VG) named system Note: the Physical Volume (PV) creation on LUKS container is implicit.
vgcreate system /dev/mapper/crypt
We create two Logical Volumes (LV) in our Volume Group (VG) system.
The first LV contains our swap. We name it swap.
A good size for it is RAM Size * 2.5
lvcreate --name swap -L 80G system
The Second LV contains our BTRFS File System. We name it root.
lvcreate --name root -l 100%free system
The LVs are mapped into the system as /dev/{VG}/{LV} and /dev/mapper/{VG}-{LV}
File system Creation
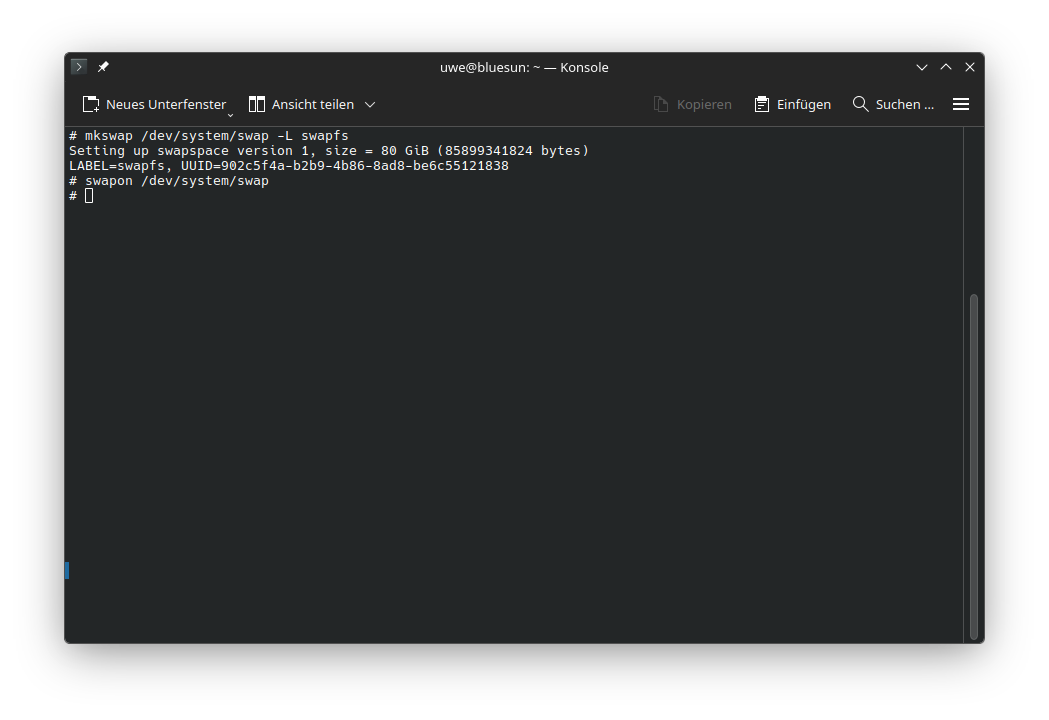
Create swap on /dev/system/swap and name it swapfs
mkswap /dev/system/swap -L swapfs
Enable swap
swapon /dev/system/swap
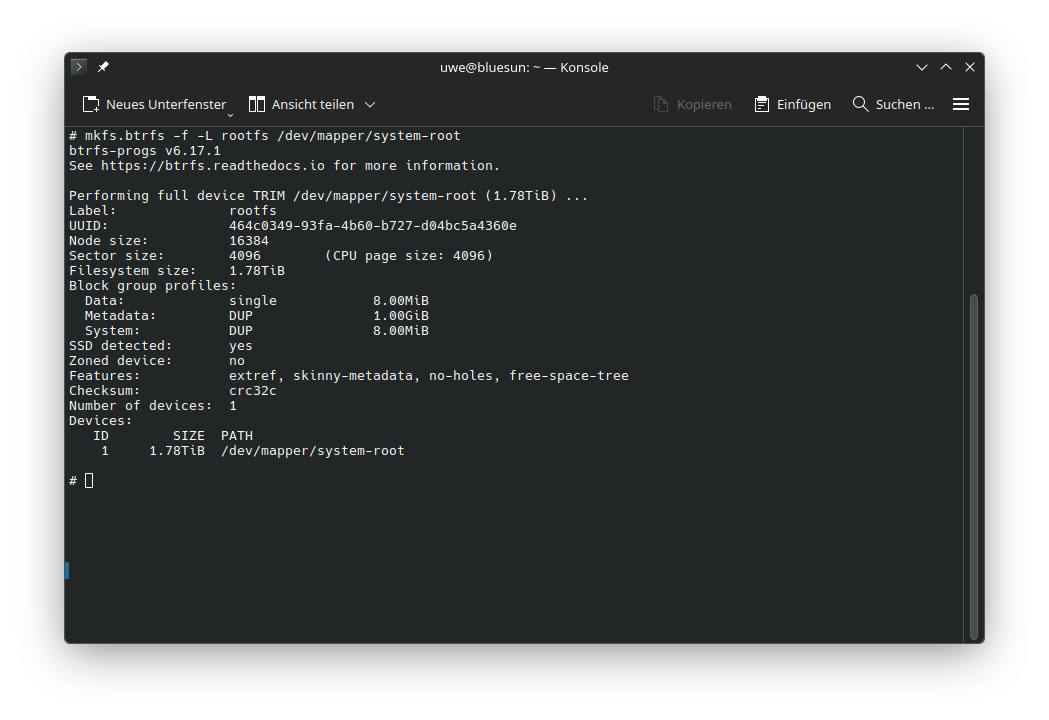
Create BTRFS on /dev/mapper/system-root and name it rootfs
mkfs.btrfs -f -L rootfs /dev/mapper/system-root
Create the BTRFS Subvolumes
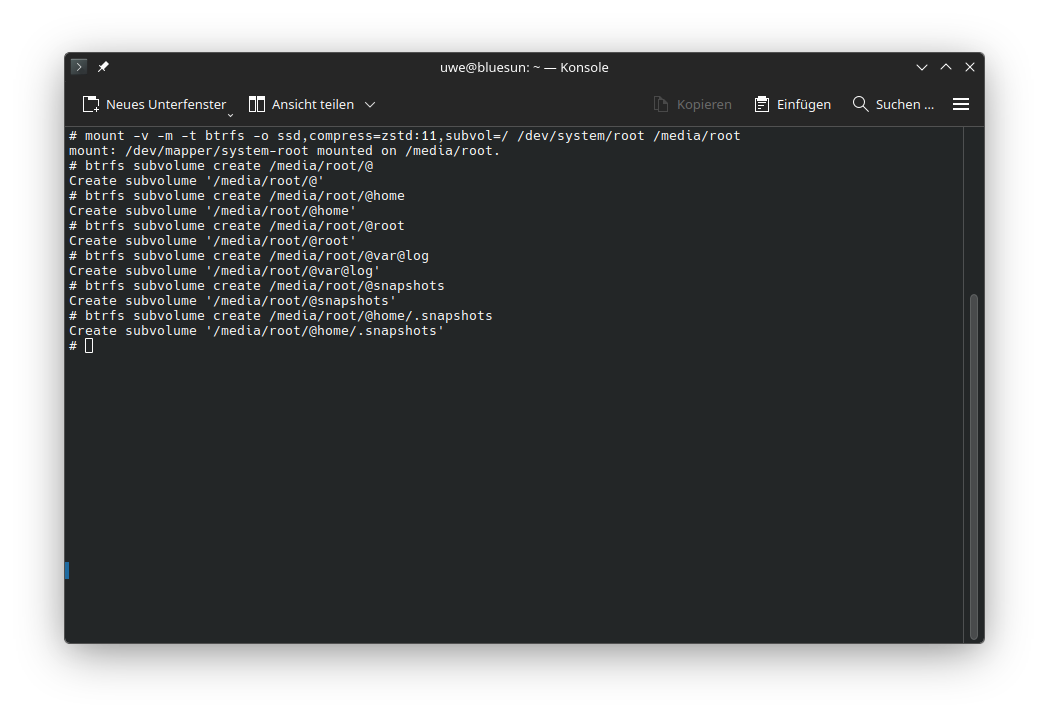
mount -v -m -t btrfs -o ssd,compress=zstd:11,subvol=/ /dev/system/root /media/root
btrfs subvolume create /media/root/@
btrfs subvolume create /media/root/@home
btrfs subvolume create /media/root/@root
btrfs subvolume create /media/root/@var@log
btrfs subvolume create /media/root/@snapshots
btrfs subvolume create /media/root/@home/.snapshots
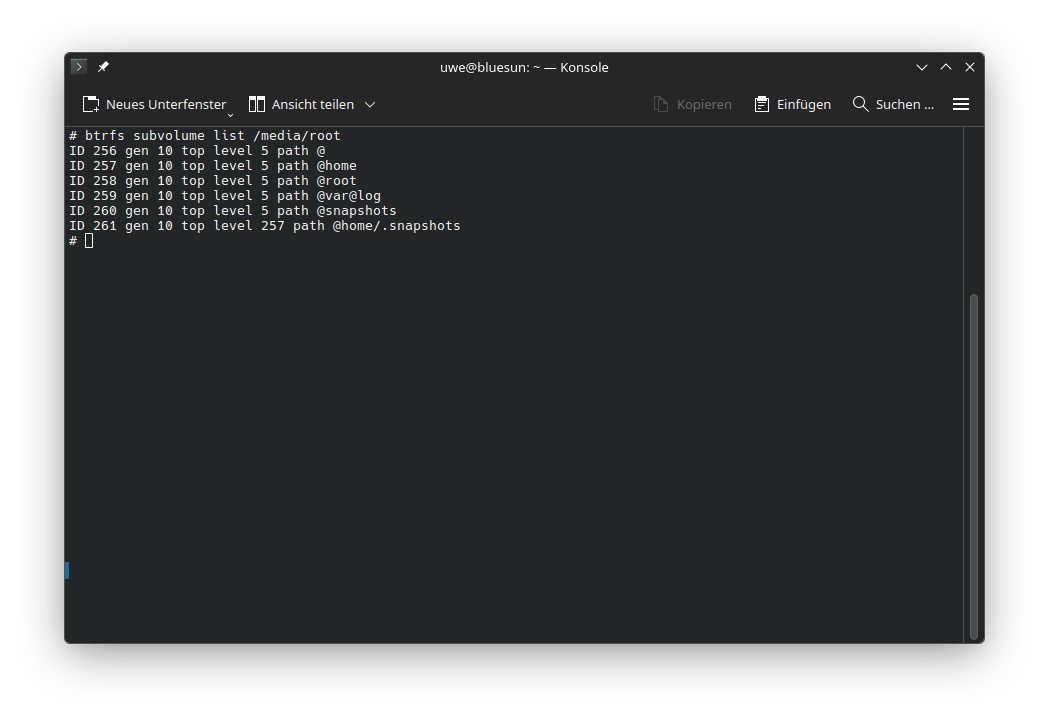
check if all is done correctly
btrfs subvolume list /media/root
Set @ as the default subvolume
btrfs subvolume set-default /media/root/@
check if it’s set correctly
btrfs subvolume get-default /media/root
 cleanup
umount /media/root
Mount File systems for use in the chroot Environment
mount -t btrfs -o compress=zstd:11,ssd,noatime,subvol=/@ /dev/system/root /media/root
chmod 755 /media/root
mount -m -t btrfs -o compress=zstd:11,ssd,noatime,subvol=/@root /dev/system/root /media/root/root
mount -m -t btrfs -o compress=zstd:11,ssd,noatime,subvol=/@var@log /dev/system/root /media/root/var/log
mount -m -t btrfs -o compress=zstd:11,ssd,noatime,subvol=/@snapshots /dev/system/root /media/root/.snapshots
mount -m -t btrfs -o compress=zstd:11,ssd,noatime,subvol=/@home /dev/system/root /media/root/home
mount -m -t vfat /dev/nvme0n1p1 /media/root/boot
check if everything is mounted in the right place
findmnt -R /media/root

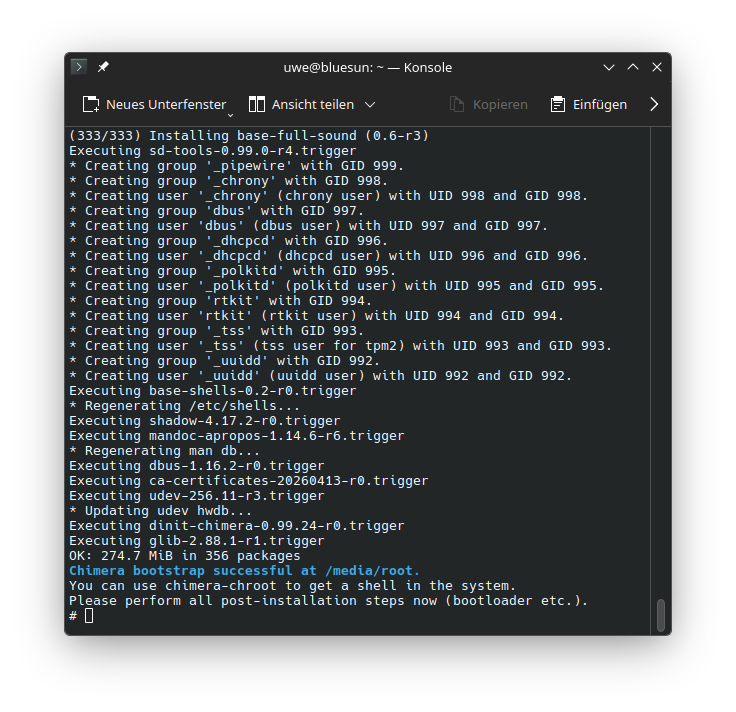
Bootstrap Chimera Linux
Chimera Linux’s chimera-bootstrap per default installs the base-full package from the official repository into the traget directory.
This is the safest option and the only one covered in this guide.
cd
chimera-bootstrap /media/root
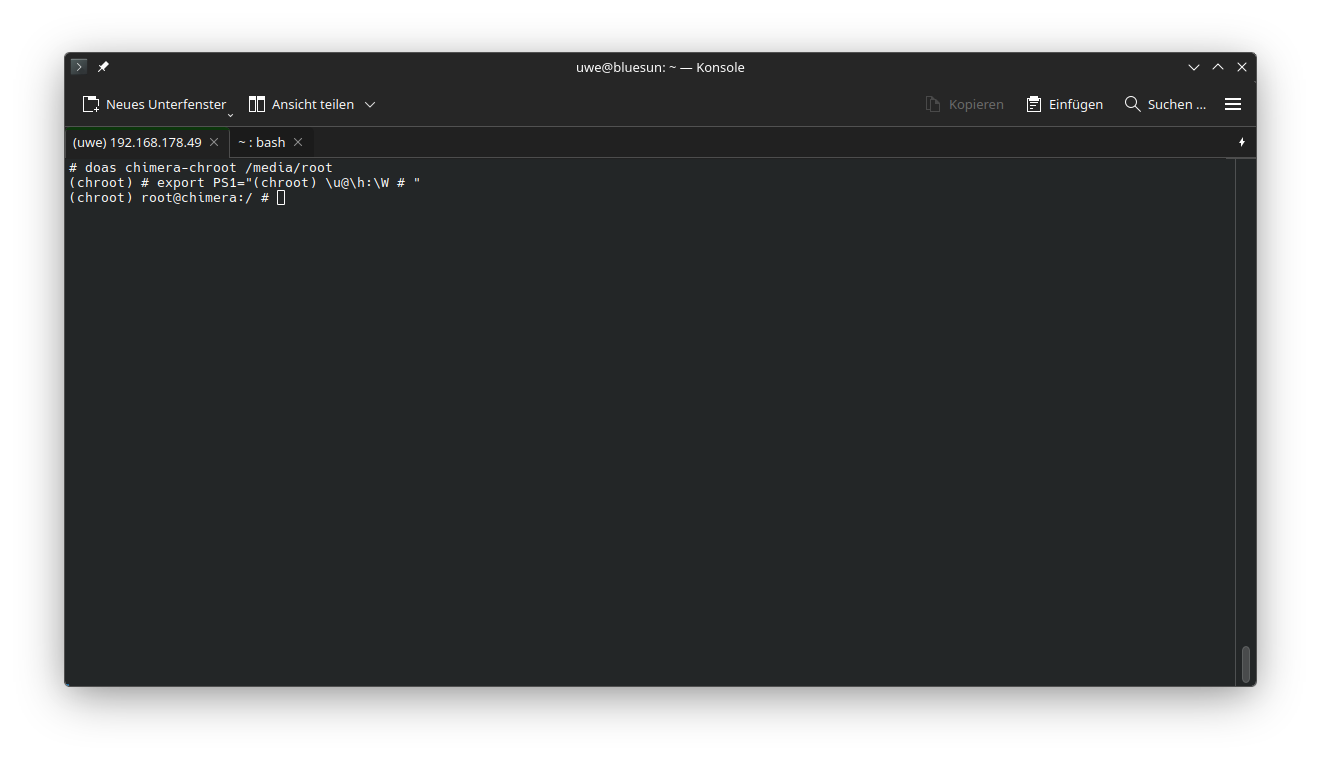
chroot into the new Chimera Linux Installation
doas chimera-chroot /media/root
export PS1="(chroot) \u@\h:\W # "
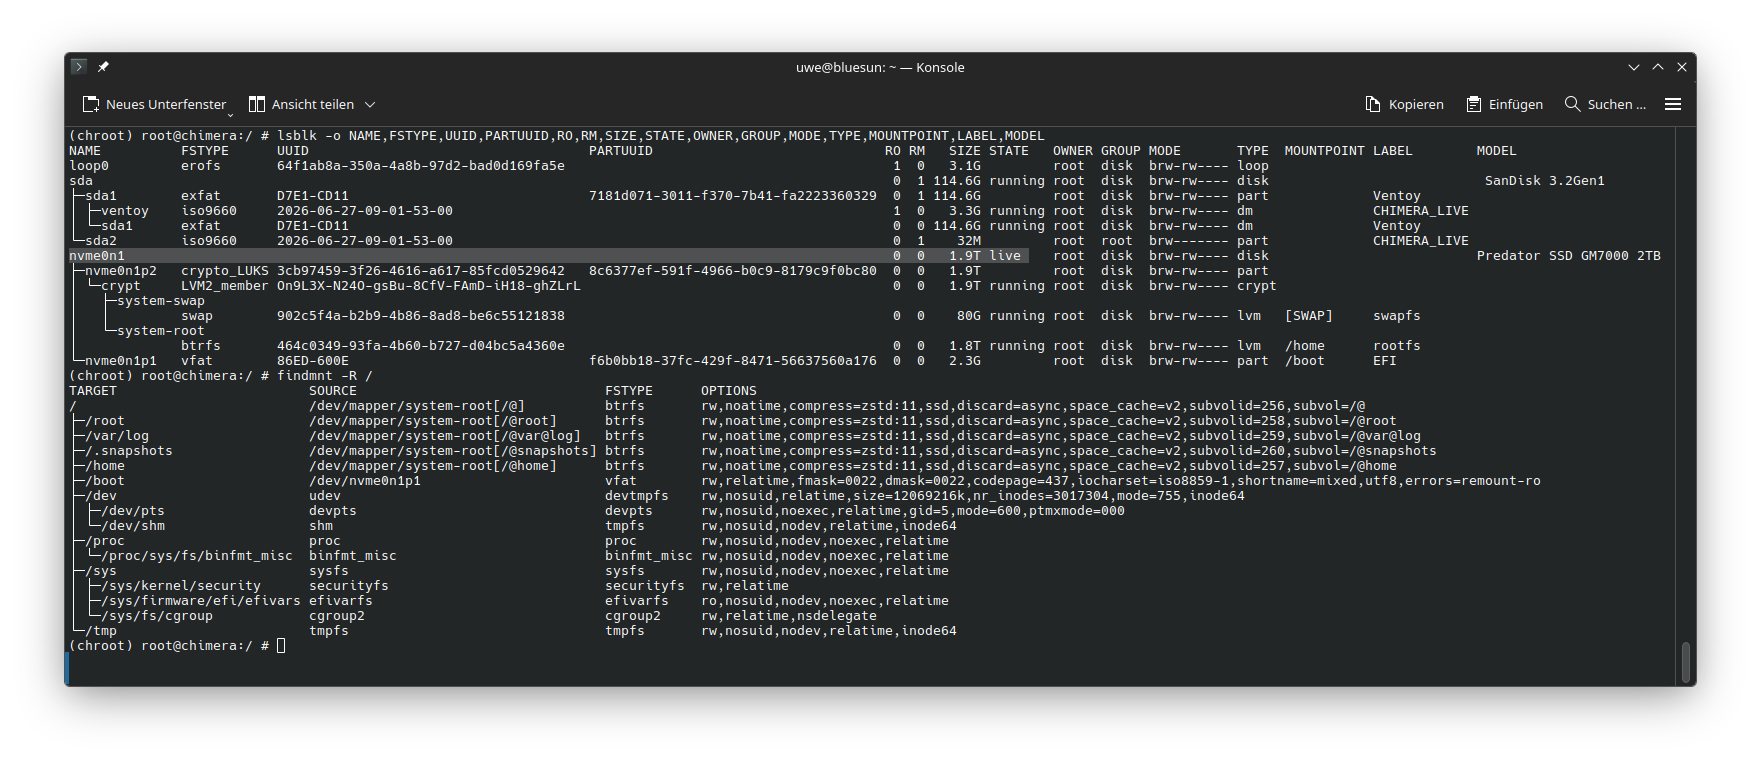
Check mounts
lsblk -o NAME,FSTYPE,UUID,PARTUUID,RO,RM,SIZE,STATE,OWNER,GROUP,MODE,TYPE,MOUNTPOINT,LABEL,MODEL
findmnt -R /
Note: UUIDs device names and size can differ.
Update Chimera Linux
(Optional) Set the path to a chimera mirror
If no Mirror is specified the default Repository will be used
mkdir -p /etc/apk/repositories.d
cat << 'EOF' > /etc/apk/repositories.d/00-my-local-repo.list
#This is the default
#set CHIMERA_REPO_URL=https://repo.chimera-linux.org
#Path to the Chimera Repo local mirror directory on this machine
set CHIMERA_REPO_URL=http://chimeramirror.fritz.box
EOF
Update the Installation and configure the users Repository
In case of errors run apk fix.
apk update
apk upgrade
apk add chimera-repo-user
apk update
apk upgrade --available

User Configuration
Set root user account password
passwd root
Create main user account and set password
useradd -m -G wheel,kvm,users,plugdev -s /bin/sh uwe
passwd uwe
Set the hostname
echo myhostname > /etc/hostname
Set the Timezone
The Timezone is set to CET
Adjust accordingly.
ln -sf /usr/share/zoneinfo/Europe/Berlin /etc/localtime
Configure keymaps
cat << 'EOF' > /etc/default/keyboard
# KEYBOARD CONFIGURATION FILE

# Consult the keyboard(5) manual page.

KMAP=de

XKBMODEL=pc105
XKBLAYOUT=de
XKBVARIANT=nodeadkeys
XKBOPTIONS=

BACKSPACE=guess
EOF
Service configuration
Now is a good moment to read up on Chimera Linux’ Package Management and Service Management
(optional) quick install
This is a quick one-liner to install all needed packages. Please look at the individual sections for details. Skip this if this is your first Chimera Linux instalaltion
apk add nvme-cli parted cryptsetup-scripts btrfs-progs dosfstools xfsprogs e2fsprogs ntfs-3g f2fs-tools mdadm lvm2 networkmanager linux-lts linux-stable grub-x86_64-efi plasma-desktop openssh-dinit flatpak smartmontools ufw chromium firefox thunderbird libreoffice git btop fastfetch curl lynx neomutt vim bash bash-completion fish-shell zsh tmux btop qemu-guest-agent-dinit spice-vdagent-dinit
Install NetworkManager
We use Network Manager for Network device configuration
apk add networkmanager
dinitctl enable -o networkmanager
Enable syslog-ng
The default logging system on Chimera is syslog-ng, which is part of base-full. Enable the syslog daemon as follows
dinitctl enable -o syslog-ng
Enable sshd
dinitctl enable -o sshd
Install Firewall
apk add ufw
dinitctl enable -o ufw
ufw allow ssh
We can see the firewall status via
ufw status
Install and configure flatpak
apk add flatpak
flatpak remote-add --if-not-exists flathub https://dl.flathub.org/repo/flathub.flatpakrepo
Install shells
Install your prefered shell and don’t forget to enable it for your user e.g.
chsh -s /bin/bash uwe
tmux
apk add tmux
bash
apk add bash bash-completion
fish
apk add fish-shell
zsh
apk add zsh
Install File Sytem tools
apk add smartmontools
apk add nvme-cli
apk add parted
apk add cryptsetup-scripts
apk add btrfs-progs
apk add dosfstools
apk add xfsprogs
apk add e2fsprogs
apk add ntfs-3g
apk add f2fs-tools
apk add mdadm
apk add lvm2
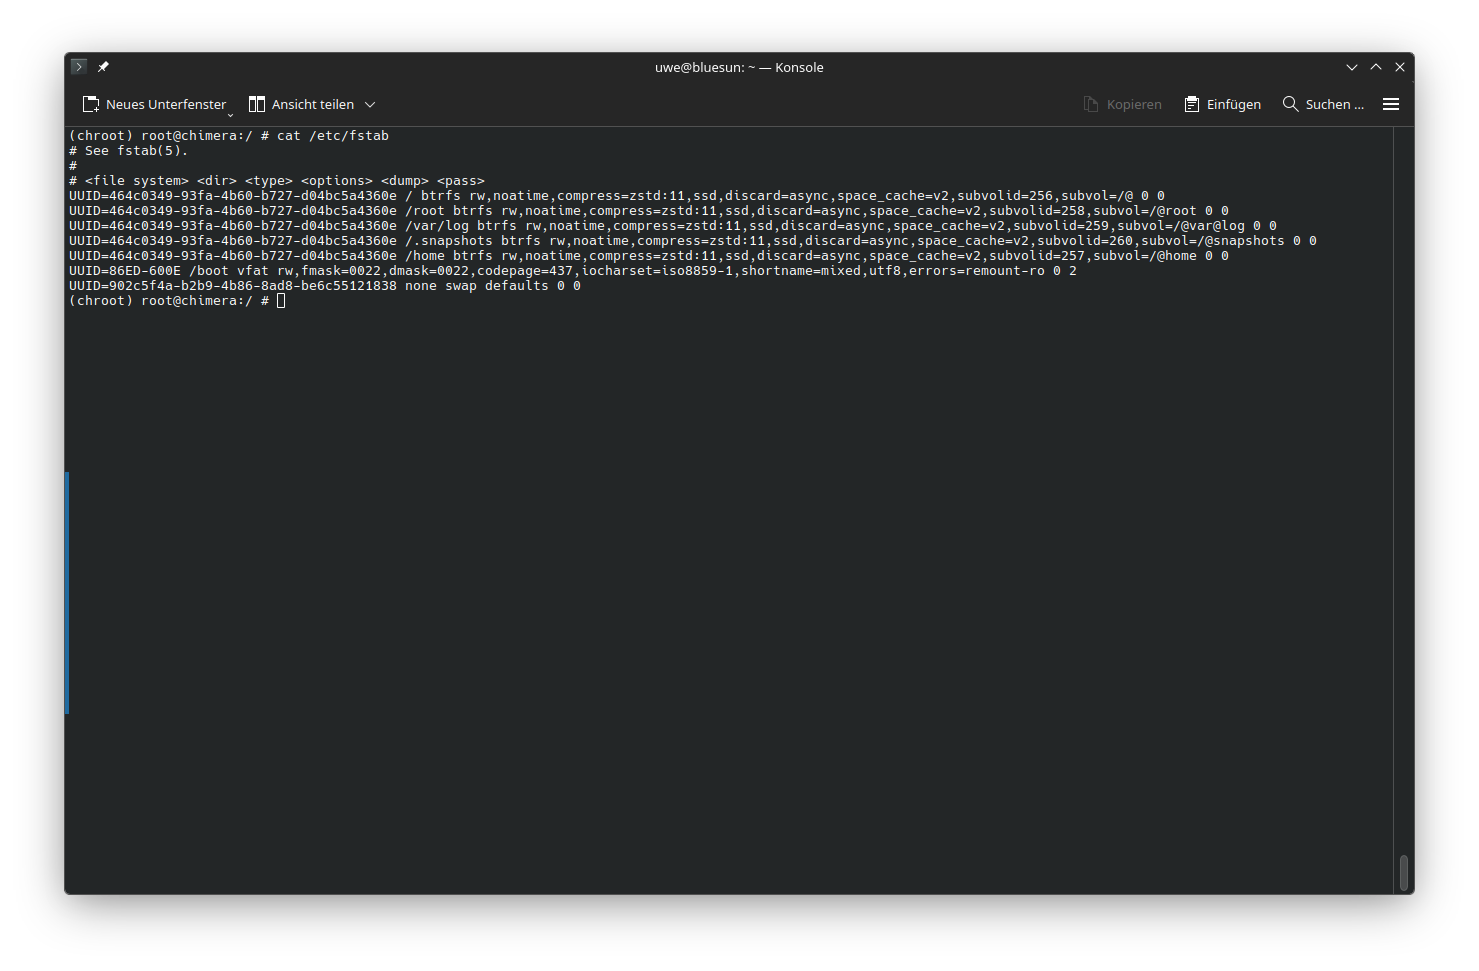
Build /etc/fstab
genfstab -U / >> /etc/fstab
check generated file
cat /etc/fstab
Build /etc/crypttab
Get the UUID for the LUKS Container on /dev/nvme0n1p2
lsblk -o NAME,FSTYPE,UUID,TYPE,MOUNTPOINT,LABEL | grep LUKS
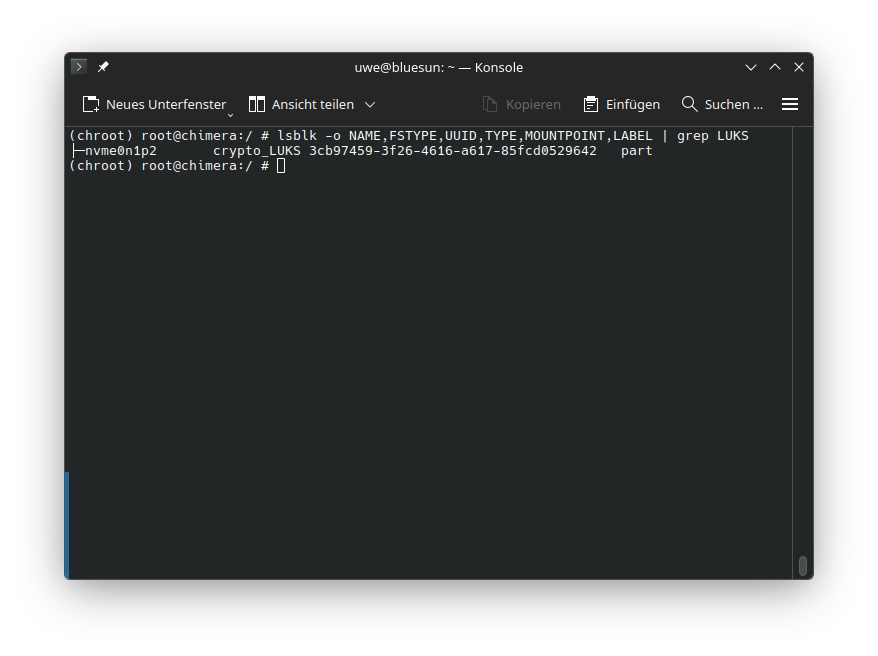
Write /etc/crypttab
echo "crypt UUID=3cb97459-3f26-4616-a617-85fcd0529642 none luks,discard" > /etc/crypttab
Install the Linux Kernel
Chimera Linux provides the linux-lts and linux-stable Kernel packages
we will install both and the GRUB
apk add linux-lts
apk add linux-stable
update-initramfs -c -k all
Install GRUB
apk add grub-x86_64-efi
mount -o remount,rw /sys/firmware/efi/efivars
grub-install -v --target=x86_64-efi --efi-directory=/boot
update-grub
Install ZFS support
apk add zfs
Install some tools
apk add git
apk add btop
apk add fastfetch
apk add curl
apk add lynx
apk add neomutt
apk add vim
(optional) QEMU/KVM VM guest agent services
apk add qemu-guest-agent-dinit spice-vdagent-dinit
dinitctl enable -o spice-vdagentd
dinitctl enable -o qemu-ga
Install KDE
apk add plasma-desktop
dinitctl enable -o sddm
Install Essential software
apk add chromium firefox thunderbird libreoffice
All done time to exit the chrot
exit
And reboot the machine
doas reboot